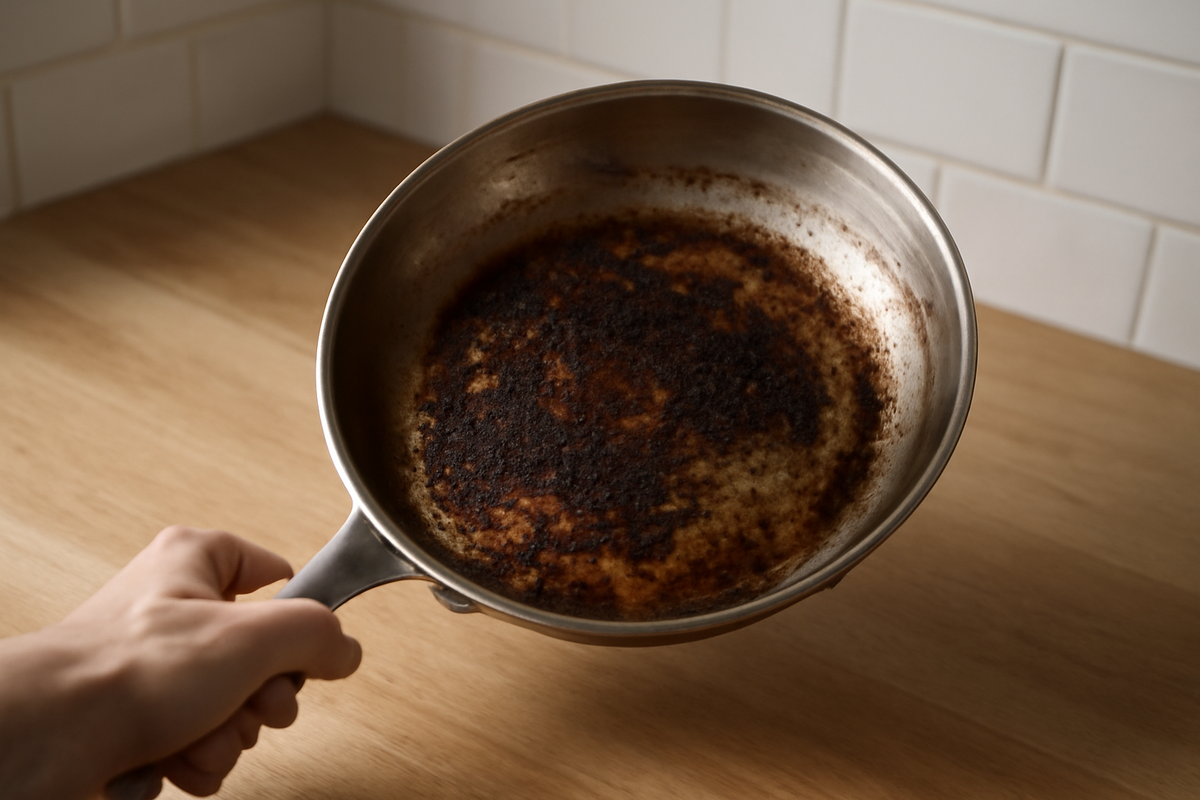
The pan sat in the sink like a guilty secret, the air still holding a faint, sharp smell of something that once wanted to be dinner and ended up as charcoal. The bottom was etched with a black, crackled landscape of burnt-on grease, shimmering stubbornly under the kitchen light. You tipped it, ran some hot water over the surface, and the mess didn’t even blink. It clung defiantly to the metal, as if it had every right to stay. In that moment, it’s hard not to feel judged by your own cookware.
The Quiet Drama of a Burnt Pan
There’s a particular quiet that settles over the kitchen after a cooking mishap. The sizzle is gone, the rush has passed, and you’re left alone with the evidence: a once-trusty frying pan that now looks like it’s survived a small house fire. Maybe you walked away for “just a minute.” Maybe the oil got a bit too enthusiastic. Maybe a conversation or a notification stole your attention. Whatever the reason, here you are.
You run a finger over the cooled grease. It’s rough, almost waxy, fused to the pan like it was poured there centuries ago. You picture hours of scrubbing, wrists aching, splatters of soapy water on your shirt. The temptation to just shove the pan into the back of a cupboard—or the trash—grows quietly.
But this pan has history. Pancakes on slow Sunday mornings. Crispy potatoes crowding the edges. Late-night grilled cheese with too much butter and not enough shame. It deserves better than a slow exile under the sink, and frankly, so do you. This isn’t the end of a pan. It’s a puzzle. And the good news is: it’s entirely solvable.
There’s a certain satisfaction in rescuing something you thought was ruined, in learning that a seemingly impossible mess is actually just chemistry waiting for the right nudge. This is less about punishment by scouring pad and more about understanding the quiet logic of heat, fat, and time—then turning that logic on its head.
The Science Clinging to the Bottom of Your Pan
Before you reach for the harshest cleaner under the sink, it helps to know what you’re really fighting. That blackened mess is not just “dirt.” It’s a cocktail of carbonized food bits, oxidized fats, and stubborn oils that have literally baked onto the surface. High heat has transformed them into a brittle, clingy shell that plain dish soap and a quick wipe won’t touch.
Grease doesn’t like water. It shrugs off a simple rinse like a raincoat in a drizzle. But it does have weaknesses: alkalinity, abrasion, time, and temperature. Baking soda, for example, is mildly alkaline and gently abrasive; dish soap is engineered to latch onto fat molecules and lift them away; boiling water softens and loosens the bonds holding burnt bits in place.
Once you see that you’re not battling some ancient curse but a set of predictable reactions, the task becomes…almost interesting. Less drudgery, more experiment. The pan doesn’t need punishment. It needs the right sequence.
The Gentle Rescue: A Step-by-Step Ritual
1. Pause and Cool Down
First rule: don’t shock a hot pan. It’s tempting to scream “No, no, no!” inside your head and douse it under cold water, but dramatic temperature swings can warp or crack some pans, especially non-stick or certain delicate materials. Instead, take a breath. Turn off the heat. Move the pan to a cool burner or a trivet and let it sit until it’s warm but not scorching.
While it cools, look at that burned surface like a map. Is it a thin, even film of varnish-like brown? Thick, flaking black patches? Sticky residue that still feels oily? Each clue tells you how patient you might need to be. This is not a five-second fix. It’s a short ritual.
2. Harnessing Heat and Water
Once the pan is warm—not screaming hot—fill it with enough hot tap water to cover the burnt area. Add a generous squirt of dish soap and stir it around with a wooden spoon or spatula. The water should look a bit cloudy and slippery.
Set the pan back on the stove and bring the soapy water to a gentle simmer. The heat will coax the burnt-on grease to swell, soften, and pull away from the metal. It’s like loosening a stubborn label from a jar with warm water, just more dramatic.
Let it simmer for 10 to 15 minutes. The kitchen air may fill with a faint ghost of the earlier disaster, but now it’s softened, tamed. Occasionally nudge the bottom with a spatula, and you might feel flecks starting to break loose and drift through the water like tiny dark snowflakes.
3. The Power of Baking Soda and Patience
Turn off the heat and let the water cool just enough that it’s safe to handle. Carefully pour it out, noticing the freed flecks of burnt food escaping down the drain. You’ll probably still see plenty of stuck-on patches, but they already look a little less invincible.
Now, sprinkle a generous layer of baking soda over the damp surface of the pan. The water left behind will form a paste with it—chalky, soft, slightly gritty. This is your secret helper: mild enough to respect your cookware, tough enough to challenge the char.
With a non-scratch sponge or a soft-bristled brush, start working small circles over the burnt areas. You’ll feel a quiet resistance, then a slow give as the top layers begin to surrender. This isn’t about brute force. It’s about persistence and rhythm—press, circle, lift, breathe.
If the mess is especially grim, you can turn the baking soda into a heavier paste. Add just a few drops of water at a time until it’s thick, then spread it over the worst spots and walk away for 15 to 20 minutes. Let time do some lifting.
4. When to Call in Vinegar (and When Not To)
If your frying pan is stainless steel, uncoated cast iron, or enamel, a splash of vinegar can become a powerful ally. Vinegar reacts with baking soda, fizzing lightly, loosening the tension between grease and metal. After scrubbing with baking soda, drizzle a little white vinegar over the surface.
The hiss and foam feel a bit like an apology from the pan. Let it bubble and sit for a few minutes, then resume scrubbing. You may notice the burned areas lightening, flaking, surrendering in layers.
However, if you’re working with a non-stick pan, be cautious. Harsh abrasives and too much acid can wear down the coating over time. Skip the vinegar here and lean on dish soap, warm water, and the gentlest side of your sponge. Non-stick pans need extra kindness, even when you’re a little mad at them.
5. The Very Last Resort: Stronger Methods
Occasionally, a pan fights back more than usual. Thick, tar-like layers from repeatedly overheated oil or sugar can cling with almost theatrical stubbornness. Before you reach for anything harsh enough to strip paint, consider repeating the soak-and-simmer process once more with fresh soapy water. Many “impossible” stains yield on the second round.
For stainless steel, a small amount of fine steel wool or a dedicated stainless scrubber can be used sparingly, but keep it gentle, especially if you care about a mirror finish. For cast iron, you can carefully scrape with a plastic or wooden scraper, then re-season the pan afterward to restore its protective sheen.
The goal isn’t to punish the pan into submission. It’s to bring it back to a place where cooking feels easy again—where the surface invites a bit of oil and a handful of onions without judgment.
A Quick Reference for Different Types of Pans
Not all frying pans are created equal, and each responds best to its own style of rescue. Here’s a simple at-a-glance guide you can keep in mind the next time your dinner turns dramatic.
| Pan Type | Safe Methods | Avoid |
|---|---|---|
| Non-stick (Teflon or coated) | Warm soapy soak, soft sponge, baking soda paste (very gentle), low heat simmer with dish soap | Steel wool, abrasive powders, metal utensils, prolonged high heat, strong chemical oven cleaners |
| Stainless steel | Boiling water with dish soap, baking soda scrub, vinegar rinse, dedicated stainless scrubbers | Harsh oven cleaners on regular basis, extremely coarse abrasives that scratch deeply |
| Cast iron (uncoated) | Hot water and scraping, short simmer, coarse salt scrub, re-seasoning with oil afterward | Long soaks in soapy water, dishwasher, leaving it wet (rust risk), strong acids for long periods |
| Enamelled cast iron | Warm soapy soak, baking soda paste, gentle simmer with water and soap, brief vinegar use | Metal scouring pads, dropping or thermal shock, super aggressive scraping on enamel |
Listening to Your Pan: Signs You’re Doing It Right
As you work, the pan will talk back—not in words, but in textures and small changes. The harsh scratch of gritty, burnt layers will soften into a smoother glide. The dark patches will fade to brown, then to a faint amber tint that eventually disappears under the sponge.
You’ll know you’ve reached the end when the surface feels uniform again under your fingertips. No snags, no rough cliffs of residue, just the familiar glide of metal, enamel, or coating. Rinse it under warm water, tilt it to the light, and inspect it the way a jeweler inspects a stone. There might be tiny discolorations left from years of use, but if it’s smooth and clean to the touch, your pan is ready for its next story.
Dry it thoroughly with a towel, especially if it’s cast iron. A light film of oil warmed gently on the surface can restore a soft sheen to cast iron or carbon steel, almost like a small ritual of gratitude after all that effort. For non-stick, a simple dry and a gentle stack with a pan protector or cloth between layers helps keep it ready.
Preventing the Next Kitchen Disaster
Know Your Heat
Most burnt-on grease disasters start with overly ambitious heat. Many oils smoke and break down at temperatures lower than we think. Medium or medium-high is usually enough for everyday cooking in a home kitchen, especially with a good pan. Letting the pan preheat for a minute or two before adding oil, then food, gives you more control than cranking up the burner to full blast.
Respect the Oil
Oil is both friend and saboteur. Too little, and food sticks. Too much, and it can pool and overheat into a sticky, lacquered mess that coats the sides and burns in patches. Pay attention to how the oil behaves: shimmering means it’s hot and ready; smoking means it’s too hot and moments away from trouble.
Deglaze Before it’s Too Late
After cooking, when you see fond—those delicious browned bits—clinging to the bottom, that’s your cue not just for flavor, but for easier cleaning. Before it turns black and crusted, splash a little water, stock, or wine into the hot pan and scrape gently with a wooden spoon. It’s like a pre-clean, disguised as sauce-making.
Don’t Let the Pan Sit in Silence
We’ve all done it: finished eating, left the pan on the stove, and only remembered hours later. Burnt-on grease loves time. The longer it sits, the more it settles in like a houseguest who’s found the spare key. Even if you’re tired, a quick rinse with warm water and a brief soak in soapy water right after cooking can save you from a full rescue operation tomorrow.
Choose Tools that Love Your Pan Back
Metal spatulas on coating. Knives used as scrapers. Harsh steel wool on delicate enamel. These things leave tiny scratches that become perfect hiding places for grease and burnt bits later. Opt for wooden or silicone utensils, non-scratch sponges, and cloths that clean without biting into the surface.
The Quiet Satisfaction of a Saved Pan
When the pan is finally clean, resting on the drying rack or warming dry on the stove, there’s a small, grounded satisfaction that settles in. The kitchen feels lighter. The earlier panic or irritation has drained away with the cloudy water and black flecks in the sink.
You’ve done more than restore a piece of metal. You’ve kept a story going—a tool that will see the next rushed weekday breakfast, the next experimental stir-fry, the next midnight snack cooked a little too loudly. You’ve turned what could have been a small moment of defeat into one of quiet resourcefulness.
Next time the pan flares or the oil smokes, you’ll be a little more ready. Not because you’ll never burn food again (you will; we all do), but because you now know how to bring the pan back from the brink. You understand what’s happening at the bottom of that sizzling circle of metal, and you know that almost nothing is beyond rescue.
And there’s something deeply comforting about that—about knowing that even when things get scorched and stuck and seemingly ruined, a bit of heat, patience, and gentle persistence can make it all usable again.
Frequently Asked Questions
How do I remove burnt-on grease without scratching my non-stick pan?
Let the pan cool slightly, then fill it with warm water and a squirt of dish soap. Soak for 20–30 minutes, then use a soft sponge or cloth to gently scrub. If needed, add a small amount of baking soda to make a mild paste and rub very gently. Avoid steel wool, harsh scouring powders, and metal utensils, as they can damage the coating.
Is baking soda safe for all types of frying pans?
Baking soda is generally safe for most pans, including stainless steel, enamel, and non-stick, as long as you use it with a soft sponge and light pressure. On very delicate or heavily worn non-stick surfaces, use it sparingly and gently to avoid dulling the finish.
Can I use vinegar on every pan to remove burnt-on grease?
Vinegar is helpful on stainless steel and enamelled pans, especially when combined with baking soda. However, it’s best avoided for long soaks on cast iron and used cautiously on non-stick coatings. For non-stick, rely more on warm soapy water, gentle scrubbing, and short soaks.
What’s the best way to clean burnt grease off cast iron?
Scrape off as much residue as possible with a plastic or wooden scraper. Add a little water and bring it to a brief simmer, then scrape again. If needed, use coarse salt and a bit of oil as a gentle scrub. Dry thoroughly and apply a thin layer of oil, then warm the pan to re-season the surface.
Is it ever safe to use oven cleaner on a frying pan?
Oven cleaner is very strong and generally not recommended for everyday frying pans, especially non-stick, aluminum, or pans used for regular cooking. It can damage coatings and finishes, and residue may be hard to fully remove. In most cases, repeated soaks, baking soda, dish soap, and gentle abrasion will do the job without such harsh chemicals.
How can I stop grease from burning onto my pan in the first place?
Use moderate heat, preheat the pan briefly before adding oil, and avoid letting oil smoke. Don’t overcrowd the pan, and deglaze with a little liquid after cooking to loosen fond before it burns. Clean the pan soon after use, or at least give it a warm water rinse and short soak to keep grease from setting in.
My pan still has faint stains after cleaning. Is it ruined?
Not necessarily. Many pans, especially stainless steel and cast iron, develop light discoloration or patina over time that doesn’t affect performance or safety. As long as the surface feels smooth and free of sticky or gritty residue, those faint marks are usually just signs of a well-used, well-loved pan.

Hello, I’m Mathew, and I write articles about useful Home Tricks: simple solutions, saving time and useful for every day.