The frost looked almost beautiful that morning—soft white feathers curling along the freezer walls, delicate as lace and stubborn as old habits. You opened the door for a splash of milk, and instead got a blast of icy air and the guilty thud of reality: the drawers were wedged in place, ice hugged every surface, and the motor whirred a little too loudly. You knew this scene well—defrosting day—an epic of towels, unplugged cables, and lukewarm bowls of water that somehow always took hours.
But what if it didn’t have to? What if defrosting your freezer could take minutes instead of half a day… and what if one crinkly, ordinary sheet of kitchen foil could help you use less energy long after the thaw was done?
The quiet energy thief humming in your kitchen
We tend to think of energy waste as something big—drafty windows, old boilers, lights left on all night. The freezer feels innocent enough, tucked away in the corner, just humming. Yet behind that door, something surprisingly small has a big impact: frost.
Each time you open the freezer, a little bit of warm, damp air slips inside. When that air meets the cold surfaces, it freezes into a thin, milky layer. You hardly notice, not at first. But week after week, that layer thickens into hard, white crust. It creeps over the shelves, squeezes around the drawer runners, and builds up behind that mysterious back wall.
Your freezer responds like anyone forced to work in extra layers. It pushes harder. It runs longer. It gulps more electricity just to keep everything at the same temperature it once maintained with ease. In a well-used household freezer, even a few millimeters of ice can increase energy use by a surprisingly large margin over time.
So defrosting isn’t just about making more space for frozen berries or peeling the peas off the built-in glacier. It’s maintenance that directly cuts your energy use. And the faster and easier defrosting becomes, the more likely you are to actually do it before the ice turns your freezer into an arctic cave.
The old way: towels, patience, and a growing puddle on the floor
You probably know the usual script. You unplug the freezer, pull everything out, stack it in a cooler, and then stand there staring into the frosty abyss, wondering how on earth you’re going to speed this up. Maybe you’ve tried:
- Bowls or trays of steaming hot water balanced on the shelves
- A hairdryer, wafted nervously around, praying you don’t melt plastic
- Poking and scraping at the ice with a spatula, feeling slightly like a vandal
- Leaving the door open and hoping nature will handle it by dinnertime
It’s messy, it’s tedious, and the puddles spread slowly across the kitchen floor in passive-aggressive defiance. No matter how early you start, it always feels like the ice melts in geological time. You watch the drips. You move soggy towels. You swear you’ll do this more often so it never gets this bad again. Then life happens. Months pass. The frost returns.
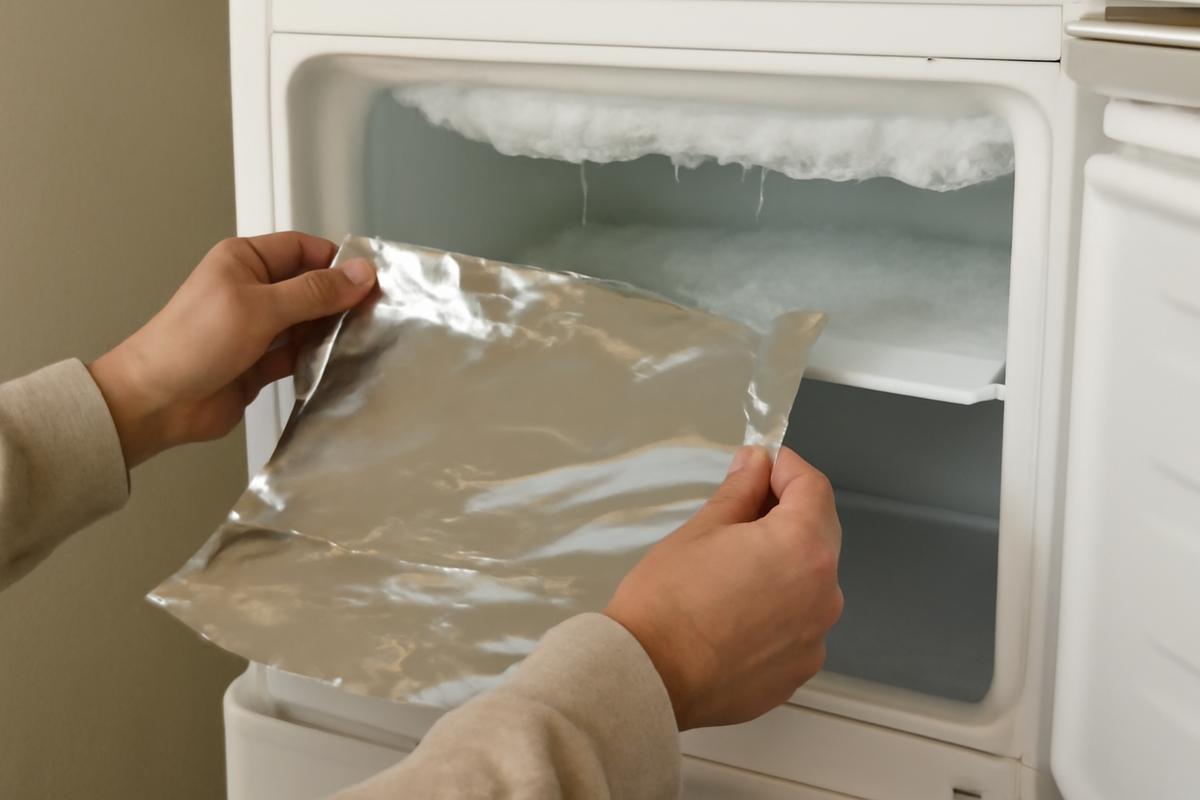
Which brings us to the thin, silver hero in your kitchen drawer: aluminum foil.
The foil trick: defrost in minutes instead of hours
Foil, at first glance, feels almost laughably flimsy against an ice buildup that’s been quietly hardening for months. But the trick isn’t about strength. It’s about clever contact, heat, and the way metal behaves when you give it a small job to do.
Aluminum foil is an excellent conductor of heat. It steals warmth from one side and hands it quickly to the other. When you pair it with hot water, it transforms simple heat into something more focused and efficient—like gently placing a warm palm directly on the stubborn ice instead of just waving warmth through the air around it.
Here’s how you turn that into a quick, almost oddly satisfying defrosting ritual.
1. Clear the deck (and keep things cold)
Pick a time when your freezer isn’t at peak capacity. Maybe just before the weekly shop, or on a day when you’re already planning to cook some of what’s inside. Take everything out, grouping items together. A cooler bag or insulated box helps, but there’s another simple trick: keep the frozen food tightly packed together. A cluster of frozen items holds its cold longer than individual pieces scattered around.
Unplug the freezer or turn it off at the wall. Leave the door open and let the frost feel its first breath of warmer air. This alone begins the work.
2. Line key surfaces with foil
You’re not wrapping the entire freezer in foil. You’re being strategic.
- Take a few long sheets of foil and line the base of the main cavity where the biggest drips will fall.
- If you have thick ice on flat shelves or along the bottom, gently press sheets of foil against those areas too, leaving them loose enough to peel off later.
- Avoid covering vents or any drainage holes. You want meltwater to escape, not pool.
The foil serves two roles: it becomes a temporary heat highway and, more importantly, a non-stick layer that will help you lift off sheets of loosened ice in one satisfying move instead of chiseling away at them.
3. Add the heat: hot water plus foil, working together
Now, fill a heatproof bowl, jug, or shallow dish with hot water—not boiling, but properly hot from the tap or kettle topped up with cold water. Place it carefully inside the freezer, right on top of the foil-lined base or a shelf. Shut the door so the steam and warmth swirl around the icy interior—or leave it slightly ajar if your freezer door seals too tightly and risks trapping pressure.
What happens next is a little performance of physics. The hot water warms the air, the warm air kisses the metal, and the foil passes that heat along its own surface, melting the ice where it touches. As the ice loosens from the walls and shelves, it begins to separate cleanly—no gouging, no clumsy hacking. Condensed droplets race along the foil, drip, and gather in predictable places instead of randomly soaking your floor.
After 10–15 minutes, check your progress. You’ll often find edges lifting, cracks forming, and sections you can now gently push away with a soft plastic spatula or just gloved fingers. Where the ice has let go of the walls, it tends to come away in big, deeply satisfying slabs.
4. Lift, peel, and wipe
This is the good part—the moment your freezer sheds its winter coat. Carefully peel away sections of foil that are now sandwiched between melting ice and the plastic walls. Many times, the ice comes with it, sliding off in one piece. Any stubborn patches get another round of hot water and foil placement.
Keep a towel or shallow tray at the front of the freezer to catch rogue drips. If your model has a drainage channel at the back, check it occasionally to make sure it’s not blocked by stray ice chunks.
Once the big pieces are gone, wipe down the surfaces with a warm, slightly soapy cloth, then rinse with a clean damp cloth. Dry thoroughly. A dry freezer interior slows the return of frost—those tiny droplets left behind are the seeds from which the next ice forest grows.
How this simple trick cuts your energy use
At first, the foil method sounds like it’s just about convenience—a clever hack to save you time and effort. But the deeper benefit is what happens after you close the door and switch the freezer back on.
Every millimeter of frost is like insulating fluff that doesn’t belong. It sits between the cold coils and the space you actually want chilled, forcing the appliance to push harder to keep the same low temperature. The ice also reduces the usable space, which means worse airflow inside the compartments and slightly more chaos in how your frozen food is stacked. Poor airflow again nudges the machine to work harder.
By removing that build-up regularly, you:
- Let cold air move more easily around your food
- Allow the coils or cooling panels to do their job directly, not through a layer of ice
- Restore the freezer to its intended, more efficient performance
That translates into less electricity drawn every day, for months. You’ll probably never see an exact line item on your bill that says “frost tax,” but you will see the cumulative effect over time if you compare notes between a heavily iced freezer and a clean one.
There’s another, quieter gain: the more effortless you make defrosting, the more often you’re willing to do it. Instead of waiting until drawers jam and doors barely close, you’ll notice early signs and think, “This will only take half an hour with some foil and hot water.” That shift alone keeps your freezer in its most efficient zone more of the year.
Small ritual, big habit: making defrosting part of your rhythm
Freezers are odd things. They feel solid and permanent, like furniture, but they’re really more like living machines with needs. Ignore them, and they sulk in higher energy use and rising frost. Give them a simple routine, and they quietly serve without complaint.
Turning defrosting into a light, almost meditative ritual helps:
- Choose a regular trigger: the change of seasons, a big cooking weekend, or every time you notice the first crunchy frosting on the top shelf.
- Pair it with something pleasant: a podcast, a favorite album, a slow Sunday cup of coffee.
- Use it as a moment to take stock of what’s in there: the forgotten berries, the soup you meant to eat, the mysterious foil package from three months ago.
You’re not just cleaning ice; you’re reorganizing your stored time and effort. Every frozen meal, loaf of bread, or precut vegetable is past you sending a little gift to future you. Keeping the freezer efficient keeps that gift-giving system running smoothly with less environmental cost.
A quick comparison of time and energy
To get a feel for how much this small habit matters, it helps to compare the traditional “leave it to melt all day” technique with the foil-fast version.
| Method | Typical Defrost Time | Hands-On Effort | Energy Impact Over Time |
|---|---|---|---|
| Slow natural melt (no foil, no hot water) | 3–6 hours or more | Frequent checking, lots of towel changes | Defrosted less often, so more months of running with heavy frost |
| Foil + hot water method | 20–40 minutes in many home freezers | Short bursts of activity, minimal puddles | Easier to repeat regularly, keeping the freezer at higher efficiency |
| Aggressive scraping or constant hairdryer use | Can be fast, but risky | High attention needed, risk of damage or overheating | No lasting extra benefit vs. foil method, plus safety concerns |
What matters isn’t one heroic defrosting day; it’s the gentle repeat. A task you can complete in under an hour feels manageable. A task that steals half a Saturday rarely becomes a habit.
Keeping the ice at bay: little choices with big effects
Once you’ve done the big melt and your freezer is humming clean and cold, a handful of small choices can stretch out the time until you need to do it again.
- Cool food before freezing: Sliding hot containers straight into the freezer adds loads of moisture and forces the motor to work harder. Let things cool to room temperature first.
- Open the door with intention: Stand there staring, door wide open, and the freezer draws in a wave of warm, wet air. Know what you’re reaching for; close the door promptly.
- Pack smart, not cramped: A full freezer is more efficient than a nearly empty one, but don’t stuff it so tightly that air can’t move. Think neatly stacked books, not a drawer of tangled cables.
- Check the seals: That rubber gasket around the door should hug the frame firmly. If it’s torn or warped, warm air sneaks in constantly, feeding more frost and higher energy use.
- Find the right temperature: Colder is not always better. For most homes, around -18°C (0°F) is ideal. Much colder, and you’re using more energy than you need.
Each tiny adjustment pares back a bit more wasted electricity, a little more unnecessary ice, and a few more surprise avalanches when you tug open the top drawer.
A sheet of foil, a shift in attention
On the surface, this is all about a simple kitchen hack: a sheet of foil, a bowl of hot water, and a quicker way to banish the frost. But beneath that shiny surface, there’s something else—an invitation to notice the quiet places where energy slips away every day, and how easily that can change with a small new ritual.
We’re used to thinking of “saving energy” as a grand project: solar panels, new appliances, sweeping home upgrades. Those matter. Yet the story often begins smaller and closer: a freezer, a little silver sheet from the drawer, and a choice to keep the machines that feed us running at their best instead of their bare minimum.
Next time you open the freezer and see those first soft curls of ice forming along the top shelf, you won’t have to sigh and postpone the battle. You’ll know exactly what to do. One unplugged socket, one bowl of hot water, a few strips of foil, and twenty-odd minutes later, the frost is gone, the motor breathes easier, and you’ve quietly turned down your home’s energy use without a single new gadget.
Sometimes the most satisfying change in a home is the one you can crumple up and hold in your hand when you’re done—thin, silvery, and suddenly far more powerful than it first appeared.
Frequently Asked Questions
Is it safe to use aluminum foil inside my freezer?
Yes, aluminum foil is safe to use in a freezer as long as you keep it away from fans, electrical components, and drainage holes. Use it on flat surfaces and remove it once the ice has melted and been cleared.
How often should I defrost my freezer?
Many households benefit from defrosting every 3–6 months, or whenever you notice frost building up thicker than a few millimeters. With the foil method, shorter, more frequent sessions are easier and keep efficiency higher.
Will this method work on very thick ice build-up?
Yes, but you may need to repeat the hot-water-and-foil cycle a few times. Start by melting and lifting the outer layers; as the bulk reduces, the remaining ice will release more quickly.
Can I leave the freezer running while defrosting with foil?
It’s best to switch the freezer off during defrosting. Leaving it on makes the compressor fight your efforts and can waste energy or stress the appliance while doors are open and warm air rushes in.
Is using a hairdryer faster than the foil method?
A hairdryer can melt ice quickly, but it carries risks: moisture near electricity, overheating plastic parts, and uneven melting. The foil and hot water method is gentler, safer, and still much faster than passive defrosting.
Does defrosting really make a big difference to my energy bill?
On its own, one defrost won’t transform your bill. But keeping your freezer free of heavy frost over months and years reduces its daily energy draw. Combined with other small habits, it adds up to noticeable long-term savings.
Can I reuse the foil after defrosting?
If the foil is still intact and clean once it’s dry, you can reuse it for another defrosting session or other non-food tasks. If it’s torn or heavily creased, it’s better to recycle it where facilities exist.

Hello, I’m Mathew, and I write articles about useful Home Tricks: simple solutions, saving time and useful for every day.